Tutorials
Step-By-Step Instructions to Diamond Painting
Are you ready to unlock your creative potential and dazzle the world with your own masterpiece?
Get ready to dive into the captivating world of diamond painting! In this step-by-step guide, we will take you on a journey where innovation meets artistry.
Discover the secrets of transforming tiny sparkling gems into stunning works of art that will leave everyone in awe.
So grab your toolkit, unleash your imagination, and let’s embark on this extraordinary adventure together!
How To Start Your First Diamond Painting
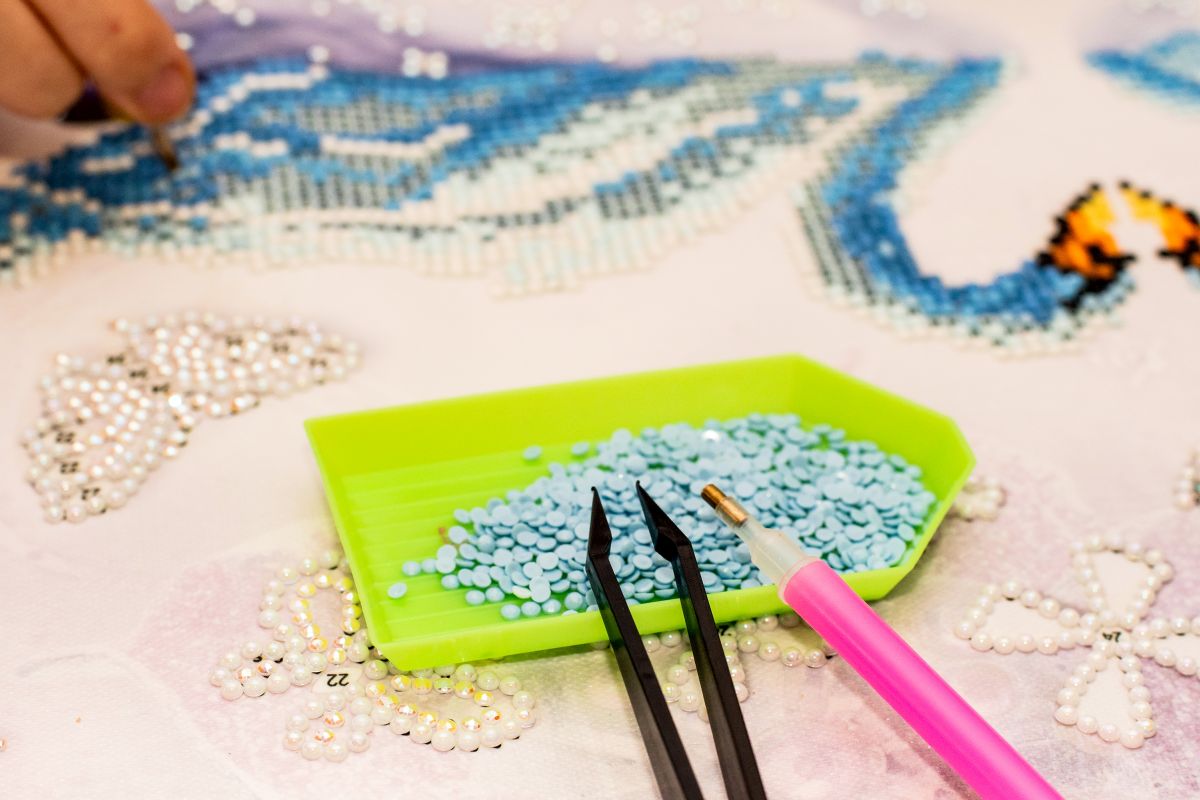
Now, you’re ready to start your first diamond painting by placing the canvas on a flat surface. This innovative craft, included in your diamond painting kit, combines the joy of painting with the brilliance of diamonds.
The preprinted canvas serves as your guide, displaying intricate patterns and designs that will come to life as you add colorful drills. Lay down a plastic sheet underneath to protect your work area and ensure easy cleanup.
Using the pen tool provided in your kit, dip it into the adhesive and pick up a drill using its sticky tip. The drills are tiny resin rhinestones that resemble diamonds, adding an elegant touch to your artwork. Gently press the drill onto its corresponding symbol on the preprinted canvas. Repeat this process for each symbol until you’ve completed one section.
As you progress through your diamond painting, it’s important to maintain a clean and organized workspace. Keep different colored drills separated or use small containers to store them neatly. This will make it easier for you to quickly find the right drill when needed.
Things You Should Know
Before starting, it’s important to know a few key things about diamond painting.
- Plastic Sheet: When you receive your diamond painting kit, you’ll notice that the canvas is covered with a plastic film or protective film. Leave this film in place until you’re ready to work on a specific section. The film keeps the adhesive sticky and prevents dust from settling on the canvas.
- Read the instructions: Diamond painting kits come with directions on how to get started. Review them so you understand how to apply the diamonds and use the tools.
- Prepare your workspace: Cover your table with a protective mat, cloth or disposable paper to avoid getting adhesive residue on the surface. Use adequate lighting.
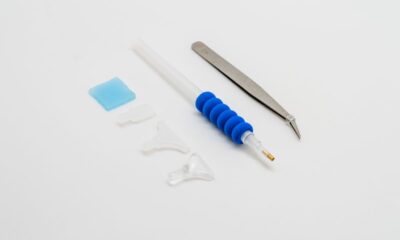
- Check your kit contents: Make sure all the diamonds and tools are included before beginning. Most kits will have the canvas, diamonds, wax/squishy pen, tray/storage containers, and a basic tool kit.
- Organize the diamonds by color/symbol: Sorting the tiny diamonds helps you quickly find the correct shade needed for each section. Use small bowls or storage containers.
- Start from the top: Begin applying diamonds in the top left corner and work your way down methodically row by row. This helps align everything properly.
- Apply gentle pressure: When placing the diamonds, press them just enough so they stick to the adhesive. Don’t push too hard and damage the canvas.
- Take breaks: Diamond painting can strain your eyes and hands. Take short breaks to relax your body every 30-60 minutes.
- Use good posture: Sit upright at a table instead of hunching over. Position the canvas at eye level to avoid neck strain.
- Secure diamonds as you go: Be sure there are no loose diamonds and cover completed sections with parchment paper to keep the diamonds firmly in place and avoid accidental shifting.
Diamond painting is therapeutic and relaxing. Put on some music or a podcast and enjoy the creative process.
What’s The Difference Between Round And Square Diamonds?
The main difference between round and square diamonds is their shape. When it comes to diamond painting, understanding this distinction is crucial. Here are some key points to consider:
Round Diamonds:
- They are the most popular choice for diamond painting.
- Their circular shape allows light to reflect evenly, giving a brilliant sparkle.
- Round diamonds are easier to handle and place on the canvas due to their rounded edges.
Square Diamonds:
- They have a more modern and geometric look compared to round diamonds.
- The straight edges of square diamonds create a neat and uniform pattern on the canvas.
- Square diamonds fit snugly together, leaving fewer gaps and resulting in a more polished finish.
Understanding the difference between round and square diamonds will help you choose the right type for your diamond painting project.
Whether you prefer the classic elegance of round diamonds or the contemporary appeal of square diamonds, each shape offers its own unique charm.
Unpack and Flatten Your Canvas
Once you’ve received your diamond canvas kit, start by opening it up and laying out the canvas to flatten it. This is an essential first step in the process of creating a stunning piece of art using diamonds.
Unpack the kit and take out the canvas carefully. Gently unfold it and lay it flat on a clean surface. Flattening the canvas ensures that you have a smooth working area, allowing for easier application of the diamonds.
Prepare Your Diamonds and Tools
Now that you’ve unpacked and flattened your canvas, it’s time to gather your diamonds and tools. Get ready to dive into the world of diamond painting with creativity and innovation!
The first thing you need is a plastic tray or a book where you can pour out your diamond chips. This will help you keep them organized and prevent any mix-ups or spills.
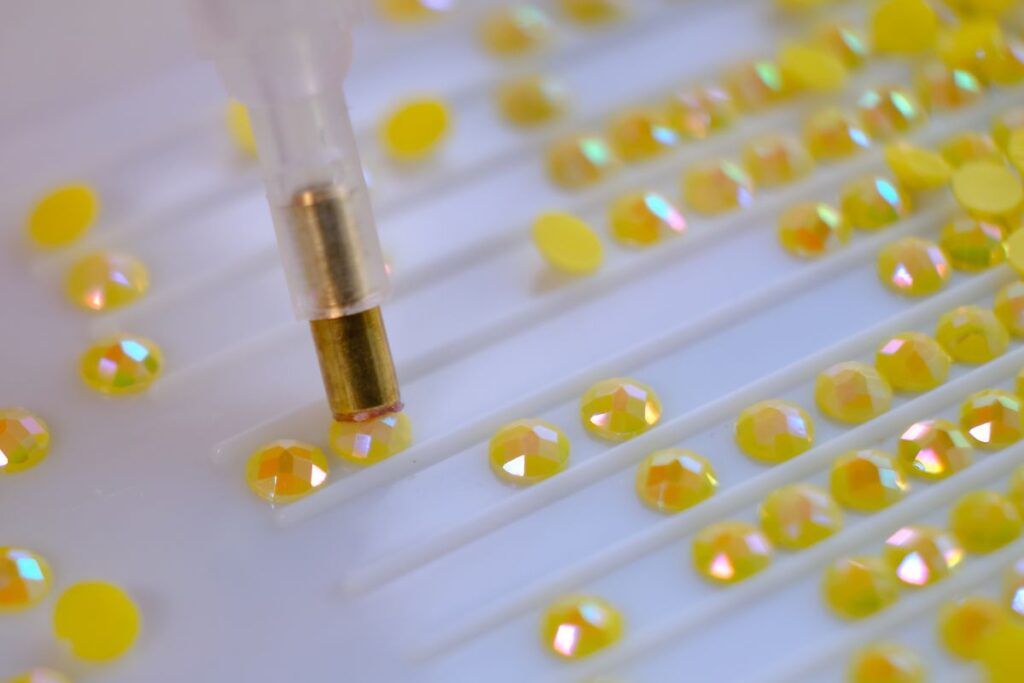
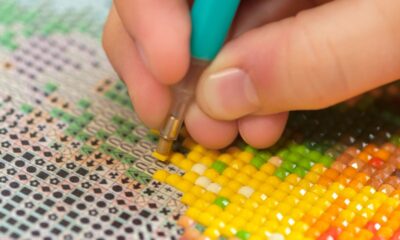
Next, grab your diamond pen, which is specially designed to pick up the diamonds easily. Its fine tip allows for precise placement on the canvas.
As you start placing the diamonds onto the adhesive canvas, use gentle pressure to secure them in place. You’ll notice how each tiny diamond chip adds sparkle and dimension to your artwork.
Take breaks as needed but try not to leave your project unattended for too long as this increases the chances of accidental spills or mix-ups.
Apply Wax to The Tip of Your Diamond Pen
To apply wax to the tip of your Diamond Pen, simply twist the bottom of the pen to expose a small amount of wax and then press the tip into it. This step is crucial in ensuring that your diamond painting experience is smooth and efficient.
Here are some key tips to keep in mind when applying wax to your Diamond Pen:
- Start with a clean canvas: Before you begin applying wax, make sure your canvas is free from any dust or debris. This will ensure that the diamonds adhere properly.
- Use just enough wax: Avoid using too much wax as it can make it difficult for the diamonds to stick to the tip of your pen. A small amount is all you need.
- Press gently but firmly: When applying the tip of your Diamond Pen into the wax, exert gentle pressure while maintaining a firm grip. This will help pick up diamonds easily and prevent them from falling off.
- Reapply as needed: If you notice that the diamonds are not sticking well, reapply a small amount of wax onto your pen’s tip.
- Store carefully: To avoid drying out, always remember to securely close the bottom of your Diamond Pen after use.
Inserting the Diamonds
Make sure you press the diamonds gently but firmly onto the adhesive canvas. This step is crucial in creating a stunning diamond painting masterpiece.
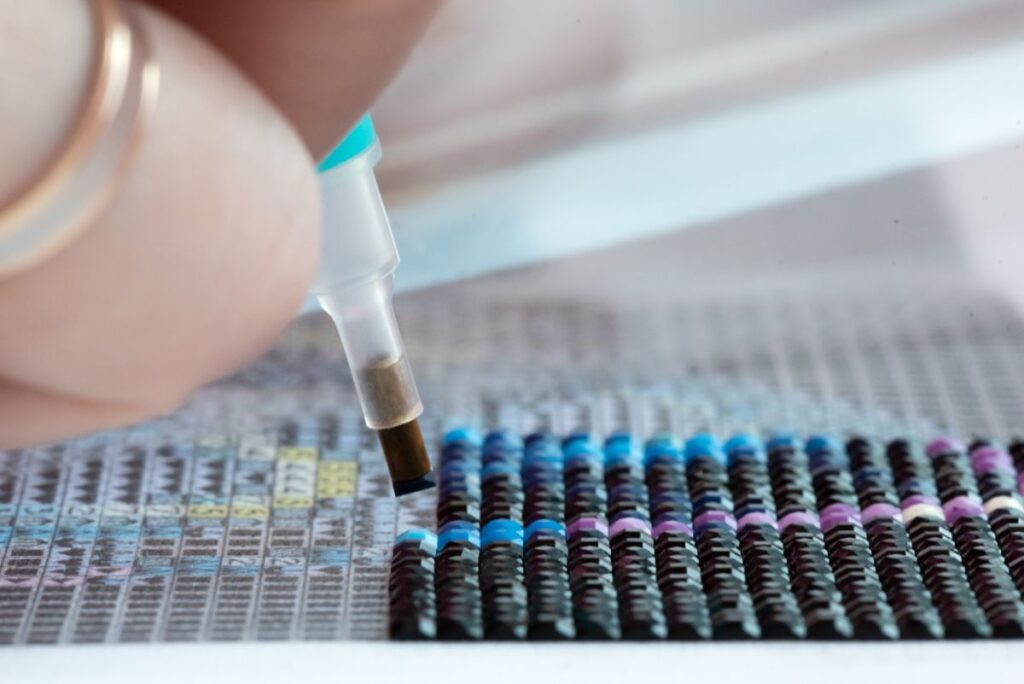
To begin, take a close look at the surface of your diamond painting canvas. Each square on the canvas has a code that corresponds to a specific color of diamond. This coding system ensures that you place the diamonds correctly, resulting in a beautiful and cohesive final product.
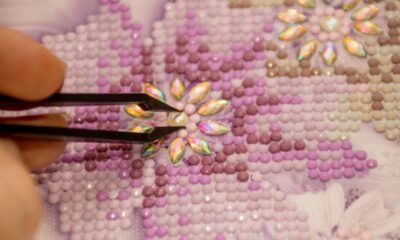
Next, examine the shape of each diamond before inserting it onto the canvas. The physical shape of the diamonds allows them to fit perfectly into their designated squares, enhancing both precision and aesthetic appeal. Use your Diamond Pen or tweezers to pick up one diamond at a time.
Once you have selected a diamond, align it with its corresponding code on the canvas. Gently press down on the diamond until it adheres securely to the adhesive surface. Continue this process, one by one, until all squares are filled with sparkling diamonds.
As you insert each diamond, marvel at how they transform your artwork into something truly breathtaking. Enjoy this innovative craft hobby as you create a dazzling masterpiece through careful placement and attention to detail.
Different Types Of Diamond Painting Pens
Each type of pen is uniquely designed, offering features to suit different needs, painting styles, and comfort preferences. Here’s an introduction to various types of diamond drill pens and how they contribute to the beautiful artistry of diamond painting.
- Diamond Drill Pens: These pens are a staple in every diamond painting kit, offering a traditional approach. Their role is to shift the diamond drill onto a color-coded, glue-coated canvas. They are adept at picking up a diamond crystal and placing it precisely on the canvas.
- Diamond Wax Pens: These pens have the special feature of applying wax straight to a diamond drill, saving an extra step in your diamond painting journey. If the wax ceases to flow, simply sharpen the pen and resume your artwork.
- Diamond Drill Wheel Pick-Up Pens: These pens feature a sticky wheel at one end and are designed to roll over a collection of diamonds of the same color, picking up several at once. They’re handy when filling in large monochromatic areas, speeding up the painting process. However, they’re not as effective in detailed regions with a variety of colors.
- Ergonomic Artisan Diamond Painting Pens: Typically made of epoxy resin or acrylic, these pens are designed for comfortable handling and usage.
Some diamond painting pens offer extra benefits, like interchangeable tips or integrated glue clay. Since diamond painting can be quite time-intensive, it’s crucial to pick a pen that feels comfortable and easy to handle.
Diamond Painting Popular Techniques
Each square on the canvas has a specific code that corresponds to a color of diamond, ensuring accurate placement.
When it comes to popular techniques in diamond painting, there are a few key ones that can help you achieve beautiful results.
One popular technique is called ‘the film method.’ This technique involves placing a piece of clear film over the canvas and using the applicator tool to pick up the flat-backed diamonds. The film helps keep the diamonds in place as you work, making it easier to see where each diamond should be placed.
Another technique is known as ‘the partial drill method.’ In this technique, only certain areas of the canvas are covered with diamonds, leaving some parts exposed. This creates a unique and dynamic look, adding depth and texture to your artwork.
The size of your canvas also plays a role in determining which technique to use. Larger canvases may require more time and precision, while smaller canvases offer quicker results.
With these popular techniques and step-by-step instructions, you can create stunning diamond paintings that showcase your creativity and innovation.
The Checkerboard Technique
When using the checkerboard technique, you’ll alternate between two different diamond colors to create a striking and eye-catching pattern on your canvas. This innovative diamond painting technique adds depth and dimension to your artwork, making it truly stand out.
To begin, gather all the necessary materials: a canvas with a pre-printed chart, diamonds in various colors, an applicator tool, and a tray for sorting the diamonds. The checkerboard technique works best when using contrasting colors that complement each other.
Start by selecting two different colored diamonds from your collection. Refer to the chart on the canvas to determine where each color should be placed.
Use the applicator tool to pick up one diamond at a time and press it onto its corresponding spot on the canvas. Continue this process, alternating between the two colors until you’ve completed your masterpiece.
The checkerboard technique creates an intriguing visual effect as the contrasting colors interlock with each other. The result is a mesmerizing piece of art that captures attention and showcases your creativity.
Row By Row Method
The row by row method allows you to work on your diamond painting project one row at a time, ensuring precision and accuracy as you place each diamond onto the canvas. This technique is perfect for those who desire innovation in their creative process.
Repeat these steps for each individual row of your design until you have completed your masterpiece. Remember to take breaks when needed and enjoy the process of bringing your vision to life.
The row by row method not only allows for precision but also helps maintain focus throughout your project.
Color By Color Method
Now that you’re familiar with the Row By Row method, let’s explore a more innovative approach to diamond painting – the Color By Color method. This technique allows you to fully immerse yourself in the creative process and achieve stunning results.
To begin, ensure that your diamond art kit is complete with all necessary materials, including a diamond applicator tool and a variety of vibrant colored diamonds. Select a pattern from your collection that speaks to your artistic vision and aligns with your desired aesthetic.
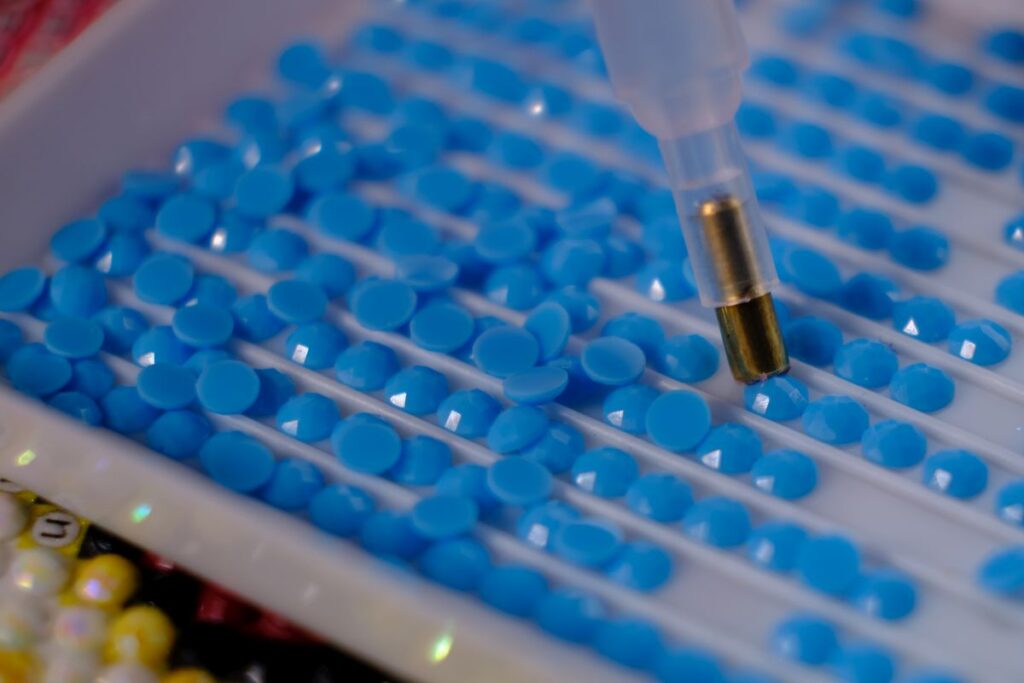
With the Color By Color method, you’ll work on one color at a time, creating an organized and efficient workflow. Start by pouring out a small amount of diamonds onto a flat surface or into the included tray. Use your diamond pen to pick up individual gems and place them onto the corresponding symbols on the canvas.
This technique not only enhances precision but also allows for greater focus and concentration as you meticulously fill in each section. As you progress through each color block, watch as your masterpiece comes to life with dazzling brilliance.
Farm Plot Method
Using the farm plot method, you’ll strategically place diamonds on your canvas to create a beautiful and cohesive design. This innovative technique takes diamond painting to the next level, providing you with step-by-step instructions for a flawless masterpiece. Here’s how it works:
- Efficient and Organized: The farm plot method allows you to work in sections, making it easier to manage and complete your diamond painting project. By breaking down the canvas into smaller areas, you can focus on one section at a time, ensuring precision and accuracy.
- Seamless Transitions: With the farm plot method, you’ll follow a chart that indicates where each color should be placed on the canvas. By placing diamonds in a systematic pattern, your design will have smooth transitions between colors, creating an impressive finished piece.
- Perfectly Aligned Drills: The farm plot method ensures that every drill is perfectly aligned with its designated spot on the canvas. This attention to detail creates a professional-looking result that showcases your artistic skills.
Apply Stretcher Bars To Your Canvas
To apply stretcher bars to your canvas, you’ll need a staple gun and some patience. This step is crucial in ensuring that your canvas diamond painting project turns out perfectly.
Stretcher bars are used to create a sturdy frame for your canvas, allowing it to be displayed beautifully once completed.
First, gather all the materials you’ll need: stretcher bars, a staple gun, and of course, your canvas. Lay the entire plastic covering flat on a clean surface and carefully unroll the canvas. Make sure to remove any wrinkles or creases by gently stretching it.
Next, measure the size of your canvas and choose stretcher bars that match its dimensions. Start by assembling two longer bars at the top and bottom of the canvas, then attach the shorter ones on each side using screws or nails.
Once you have secured all four sides with stretcher bars, use a staple gun to fasten the canvas onto the frame. Begin by stapling one side first and then move on to opposite sides, ensuring that there are no loose areas or bubbles.
Finally, trim any excess fabric from around the edges using scissors or a utility knife. Now you can start your diamond painting project with confidence knowing that your canvas is securely mounted on stretcher bars.
Remember to follow these step-by-step instructions for applying stretcher bars to your canvas in order to achieve professional-looking results for your diamond painting project. With this innovative technique, you’ll be able to create stunning artworks that will impress everyone!
Mount Your Diamond Painting To A Foam Board
This step-by-step guide will show you how to properly mount your diamond art using a foam board.
First, gather all the materials you’ll need: your completed diamond painting, a foam board, adhesive (such as glue or double-sided tape), and foam dividers (optional).
Start by laying your foam board on a clean and flat surface. Place your canvas face down on the foam board and align it carefully. Make sure there is enough space around the edges of the canvas.
Next, apply adhesive along the edges of the backside of your canvas. Be generous with the adhesive but avoid applying too much in one spot to prevent uneven mounting.
Now gently press down on the canvas to secure it firmly onto the foam board. Smooth out any wrinkles or bubbles that may have formed during this process.
If desired, you can add foam dividers along the edges to create a border effect or provide extra support for larger paintings.
Once everything is in place, allow sufficient time for the adhesive to dry completely before moving or hanging your mounted diamond painting.
Use Magnetic Hanger Bars
Now that you’ve successfully mounted your diamond painting to a foam board, let’s take it up a notch and explore an innovative way to display your masterpiece – magnetic hanger bars.
These sleek and modern hanger bars are not only functional but also add a touch of elegance to your diamond painting.
Here’s how you can use magnetic hanger bars to showcase your artwork:
- Gather Your Materials: Along with your completed diamond painting, you’ll need two magnetic hanger bars, which usually come in various sizes to accommodate different canvas dimensions.
- Prepare the Bars: Attach the adhesive side of the magnetic strips provided with the hanger bars onto each bar, ensuring they align properly.
- Position the Bars: Place one bar at the top edge of your diamond painting and another at the bottom edge. The magnets will securely hold your canvas without causing any damage or leaving marks.
- Hang It Up: Once both bars are firmly attached, find a suitable spot on your wall and hang up your diamond painting using these stylish magnetic hanger bars.
Frequently Asked Questions
Can I use different types of diamonds in the same diamond painting?
Yes, you can use different types of diamonds in the same diamond painting. This allows for more creativity and uniqueness in your artwork. Mix and match colors, shapes, and sizes to create a truly innovative masterpiece.
How long does it take to complete a diamond painting?
It typically takes around 10-30 hours to complete a diamond painting, depending on the size and complexity. However, with innovative techniques and tools, you can speed up the process and finish your masterpiece even faster.
Can I create my own diamond painting design?
Yes, you can definitely create your own diamond painting design! It allows for endless creativity and personalization. Get ready to innovate by choosing a unique image, transferring it onto the canvas, and placing the sparkling gems in place.
What should I do if I run out of a particular color of diamonds?
If you run out of a color, don’t worry! Get creative and experiment with similar shades or use different materials like beads or sequins. Your own unique touch will make your diamond painting design even more innovative.
How do I clean my diamond painting once it’s finished?
To clean your finished diamond painting, gently wipe the surface with a soft, lint-free cloth to remove any dust or debris. Avoid using water or harsh chemicals as they can damage the diamonds and adhesive.

Robbie discovered diamond painting during the pandemic to help him find something to do while being inside. This has led to his learning everything he can about painting with diamond drills, from where to find the best diamond paint kits to how to store all the accessories and tools. He wants to share his love of this hobby and create a community of sharing information.

Clever Diamond Painting Storage Hacks Revealed

Diamond Painting for Kids: The Ultimate Craft Adventure

What to Look for When Buying a Diamond Painting Kit

Finding The Right Diamond Painting Accessories and Tools

Diamond Painting Top Tips And Tricks

Step-By-Step Instructions to Diamond Painting

Discover the World of Diamond Painting
-
 Accessories2 years ago
Finding The Right Diamond Painting Accessories and Tools
-
 Accessories1 year ago
Clever Diamond Painting Storage Hacks Revealed
-
 Tips and Tricks2 years ago
Diamond Painting Top Tips And Tricks
-
 About Diamond Painting2 years ago
Discover the World of Diamond Painting
-
 Diamond Paint Kit Reviews2 years ago
What to Look for When Buying a Diamond Painting Kit
-
 Diamond Painting For Kids2 years ago
Diamond Painting for Kids: The Ultimate Craft Adventure